Capture One’s October tools make selective retouching easier to control
Local AI retouching, protected areas and numeric color choices address different parts of an editing workflow.
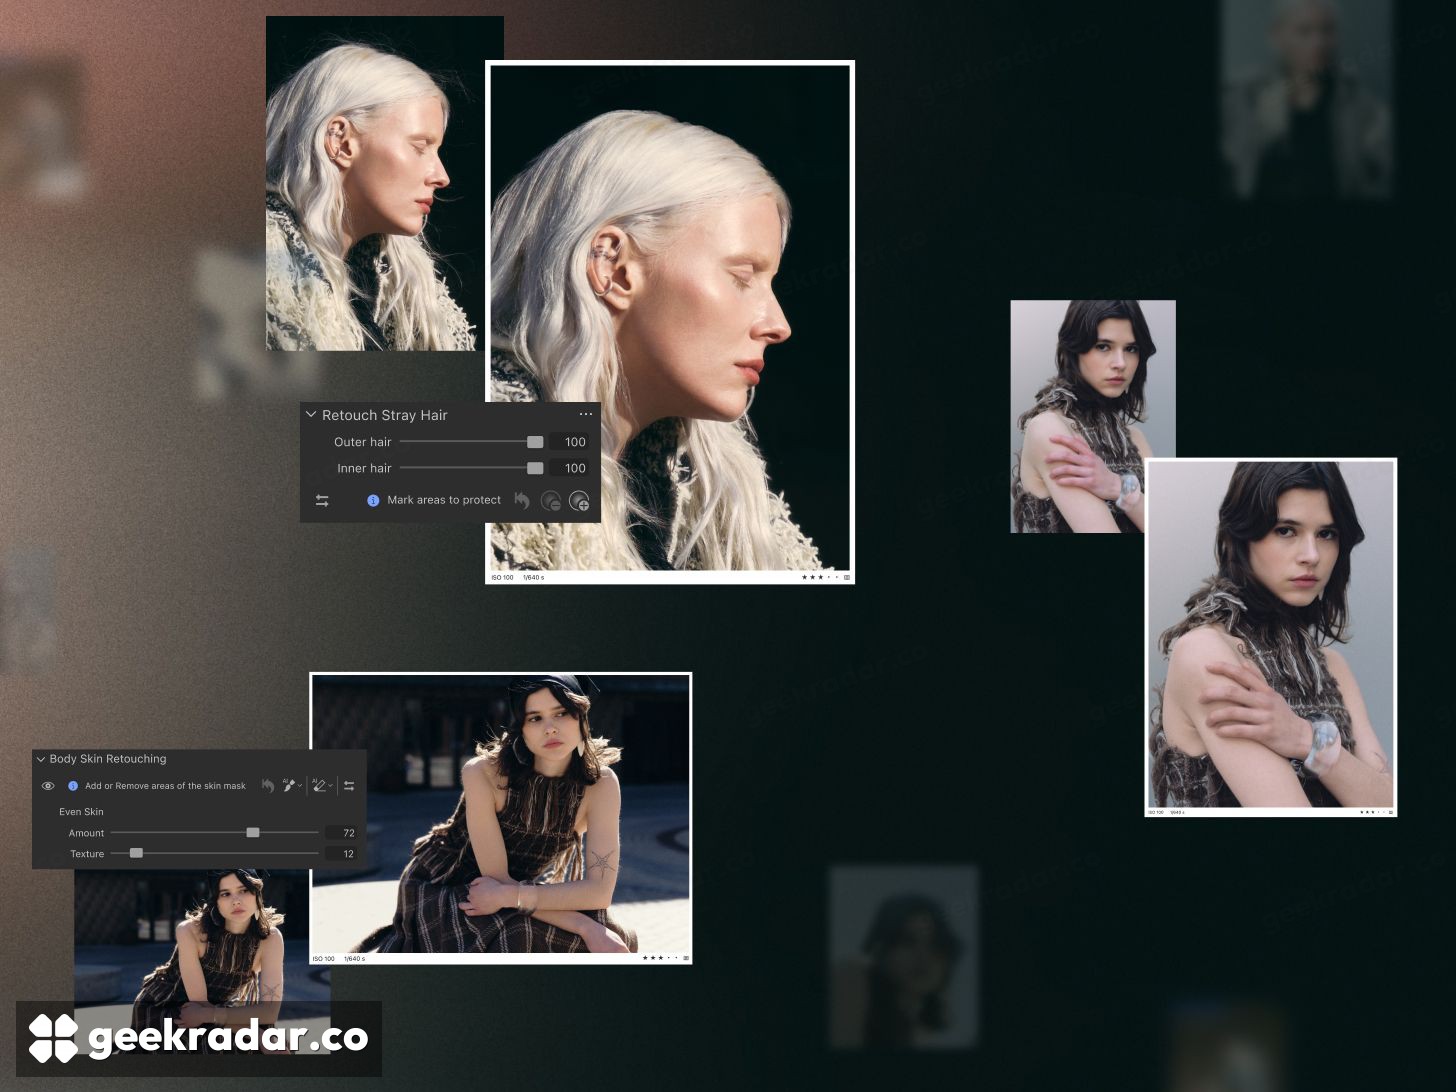
Capture One’s October update concentrates on the small corrections that consume time in portrait work: stray hairs, uneven body skin and inconsistent skin color. The tools let photographers adjust the result and protect details they want to keep, while the revised Color Editor adds direct numeric color entry.
The 16.9 feature announcement says the three new retouching tools run on the computer without uploading the image to the cloud. That is a specific statement about these operations, not a claim that every Capture One service is offline.
The important control is the exception
Stray-hair cleanup sounds like a simple deletion task until an intentional strand crosses a face or a hairstyle depends on fine edges. Capture One’s description pairs sliders with protection for areas that should remain. The exception is part of the feature: automation needs a way to stop at the photographer’s intended boundary.
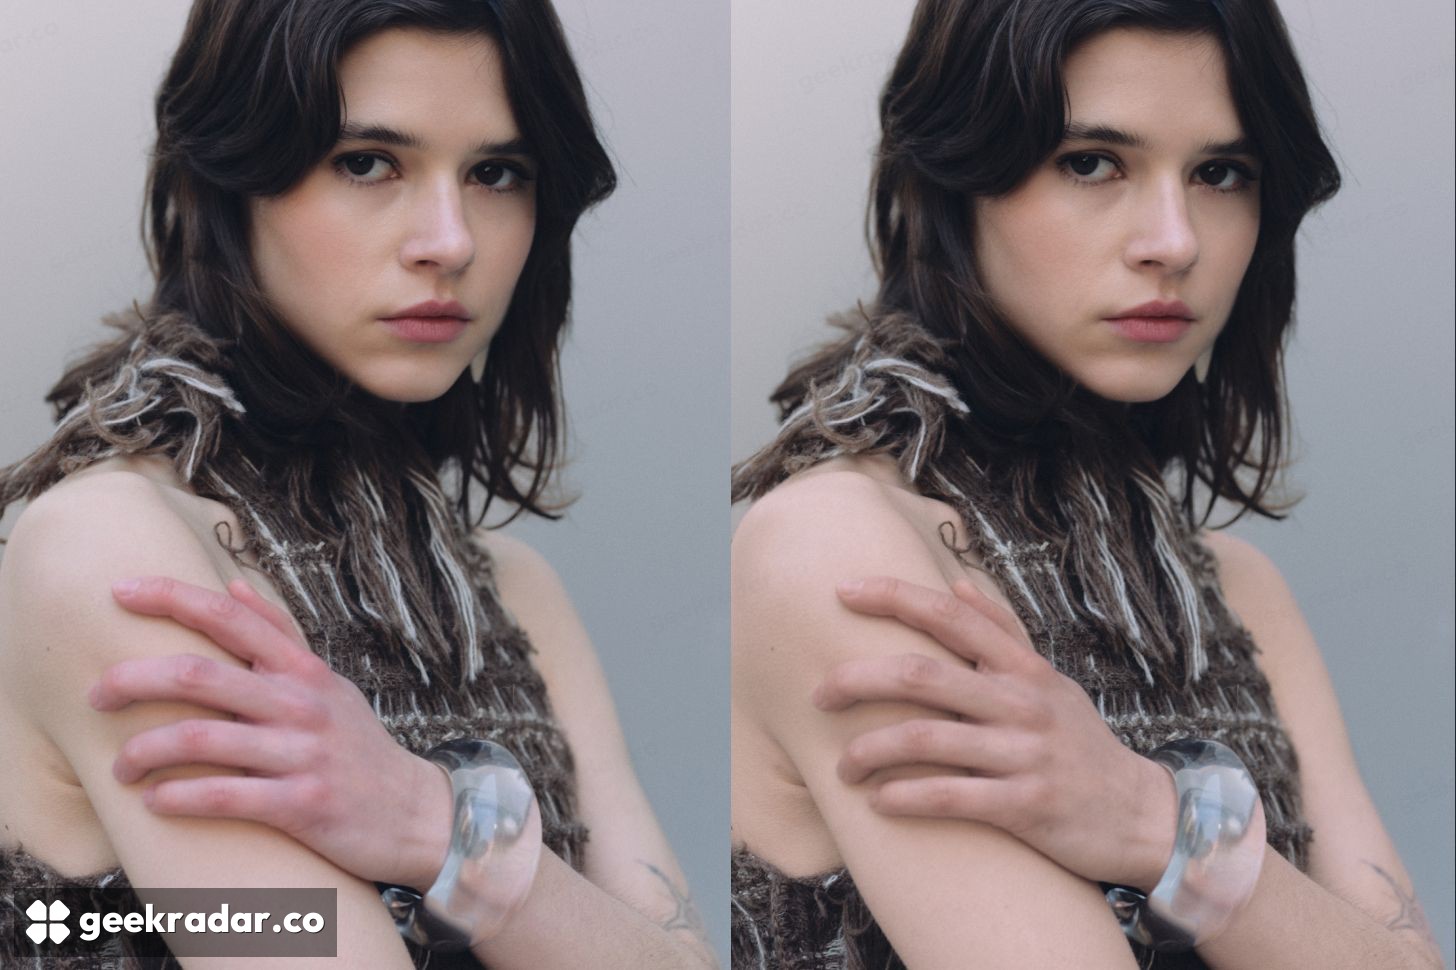
Body Skin Retouching targets uneven skin across the body, while Skin Tone Retouching addresses color differences such as casts and mismatched hands and faces. They solve different visual problems. Smoothing texture cannot be assumed to correct color, and matching color should not require erasing the texture that makes a portrait believable.
The broader release overview also places stray-hair work on mobile. It does not say that every desktop addition has identical mobile coverage, so a workflow should be checked against the particular tool and device rather than the update’s overall name.
A numeric color target still belongs in a color workflow
The Advanced Color Editor accepts RGB or HSL values, can pick a target from another image and extends uniformity adjustments beyond skin tones. For product photography, that gives a more explicit target than moving a slider until a color looks approximately right.
Entering a number is not, by itself, a guarantee of an identical appearance everywhere. A value is interpreted within a color space and eventually displayed or printed through another system. Matching a product photograph therefore still requires attention to the image’s profile, output and intended use.
This is especially important when a scene contains intentional warm or cool lighting. Making every patch of skin identical can remove the lighting that gives the image its form. The useful control is the ability to reduce an unwanted inconsistency without treating all variation as a defect.
Collaboration changes alongside the editing tools
Multi-User Sessions leaves beta in this release, with collaborators able to export images and follow the latest capture. Assisted Review adds face-specific indications for sharpness and closed eyes in the Viewer. The announcement also lists RAW support for Nikon Z5IIc on desktop and mobile.
These changes address different points in a shoot: deciding whether a frame is usable, sharing the developing session and refining the chosen image. They can reduce handoffs, but the announcement does not establish how much time any particular studio will save.
The update’s strongest direction is keeping correction close to selection and capture. A stray hair can be cleaned up without turning the portrait into a different face; a color can be specified without surrendering judgment to a preset. The useful result is less repetitive work between the photograph and the photographer’s decision.